


Introduction
Wall moulding design is a timeless and trendy way to add sophistication and character to your walls. Whether you’re renovating your living room, updating your bedroom, or just looking to add detail to a hallway, wall moulding instantly enhances any interior space.
This design trend is more than just decoration it’s a statement. With the right type of moulding, you can turn simple walls into focal points of your home. From classic to contemporary styles, moulding offers unlimited creative options that suit every aesthetic.
What Is Wall Moulding Design, Really?
At its core, wall moulding design means adding strips of trim Wall Moulding Design or paneling to your walls to give them more shape and character. You’ve probably seen it in hotels, older homes, or luxury apartments. It can be as simple as a few frames on the wall or as fancy as full paneling from floor to ceiling.
It’s not just for looks either. Some moulding styles help protect your walls from furniture marks or hide small wall imperfections. It’s one of those rare design features that are both functional and stylish.
Popular Types of Wall Moulding You Can Try
Wall moulding design comes in many styles, each with a unique purpose and look. Here are some of the most popular types that you can easily use at home.
Crown Moulding
Crown moulding is placed at the junction where walls meet the ceiling. It creates a smooth, graceful transition that makes a room feel taller and more refined. This style is perfect for adding a touch of class to living rooms, dining areas, or bedrooms. It has long been a favorite in both traditional and modern interiors.
Chair Rail
Chair rail is a horizontal strip of trim usually installed about one-third of the way up the wall. It was originally designed to protect walls from furniture damage but is now widely used as a decorative element. Chair rails can break up wall space and are often paired with contrasting paint or wainscoting below. They’re commonly seen in hallways and dining rooms.
Baseboards
Baseboards run along the bottom of the wall where it Wall Moulding Design meets the floor. They serve both a functional and decorative role by covering the gap and giving the room a neat finish. Baseboards are essential in nearly every home and help visually anchor the wall. Their size and style can vary depending on the room’s design.
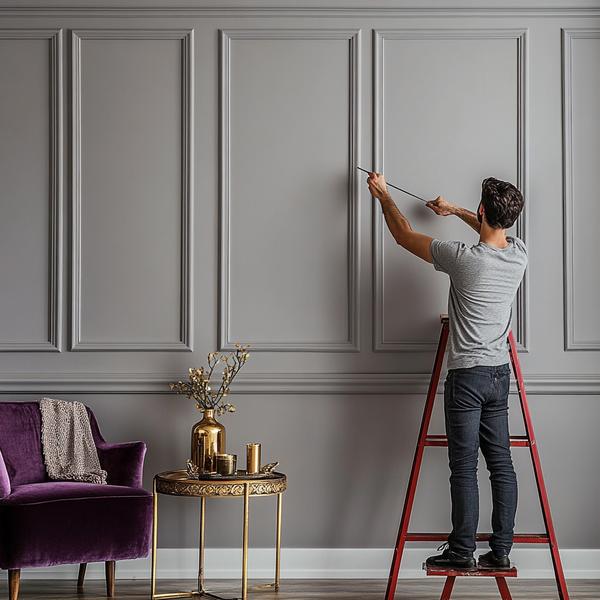
Picture frame moulding
Picture frame moulding creates elegant square or rectangular shapes on the wall, much like built-in picture frames. This type of moulding adds a formal and symmetrical look to spaces, making it a great choice for feature walls or entryways. It’s often painted in the same color as the wall for a subtle effect. It brings depth and texture without being too bold.
Wainscoting
Wainscoting is a type of paneling that typically covers the lower half of a wall. It adds warmth, structure, and traditional charm to any room. Often combined with a chair rail and baseboard, wainscoting enhances walls in foyers, stairways, and formal dining areas. It also protects walls from scuffs and marks.
Beadboard or Shiplap
Beadboard or shiplap consists of narrow wooden planks installed either vertically or horizontally. Beadboard has small grooves between each board, while shiplap features flat, overlapping boards. Both are perfect for creating a cozy, rustic, or coastal vibe in spaces like bathrooms, kitchens, or mudrooms. These designs are especially popular in farmhouse or cottage-style homes.
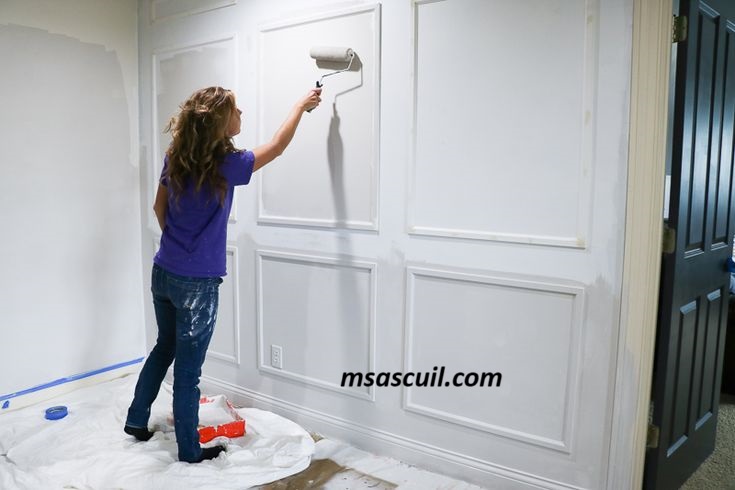
How to Create Wall Moulding (DIY Style)
Wall moulding isn’t just a trend it’s a hands-on way to bring elegance and depth to your space. Even if you’ve never done any DIY before, this project is simple enough to try and satisfying once complete.
Start With a Plan
Start with a plan before you pick up any tools. Don’t rush in without knowing what style you’re going for. Do you like classic box frames, vertical slats, or something more modern? Sketch your ideas on paper or search for photo inspiration online. Having a clear vision helps avoid confusion and keeps your layout balanced and beautiful.
Measure Your Wall
Measure your wall carefully, as this is the most important step. Use a level, measuring tape, and pencil to mark exactly where each moulding piece will go. Consistent spacing and straight lines make the difference between a polished look and a messy one. Take your time here to make sure every piece lines up.
Pick Your Material
Pick your material based on your budget and how detailed you want your design. MDF is the most budget-friendly and easy to work with it paints smoothly and is lightweight. Solid wood is more durable and offers a high-end finish. Polyurethane is another great option, especially for detailed or curved moulding, as it’s very light and easy to cut.
Cut and Prep
Cut and prep your moulding pieces according to the Wall Moulding Design measurements you marked earlier. A miter saw works best, especially for corners, so you can get clean, angled cuts. After cutting, lightly sand the edges to smooth out any splinters or roughness. Lay all your pieces on the floor and line them up to check that everything fits correctly.
Attach It to the Wall
Attach it to the wall using construction adhesive or a nail gun some people use both for extra hold. Start at one corner and work your way across, pressing each piece firmly into place. Use a level as you go to make sure everything stays straight. Accuracy here will give your moulding that clean, professional appearance.
Fill Gaps and Paint
Fill gaps and paint to complete your project. Use caulk or wood filler to seal any cracks or nail holes, and sand everything once it’s dry for a flawless finish. Then, apply paint over the moulding either the same color as your wall for a subtle effect or a contrasting color to make the design pop. When done right, moulding can look like it was always a part of your home.
Why Is Wall Moulding Design So Popular?
-
Trendy Yet Classic – It’s everywhere these days, but it’s also been used for centuries.
-
Budget-Friendly Upgrade – Costs less than full renovation but gives a high-end feel.
-
Customizable – You can go simple or dramatic depending on your style.
-
Works in Any Room – Bedroom, living room, hallway even bathrooms.
Where to Use It
You can use wall moulding design in almost any part of your home. Some ideas:
-
Living Room: Use box moulding behind the sofa for a feature wall.
-
Dining Area: Wainscoting + chair rail combo = instant luxury.
-
Bedroom: Try vertical moulding on the bed wall for height.
-
Entryway: A few picture frame mouldings add charm fast.
-
Hallways: Use narrow panels to break up long, plain walls.
Conclusion
Wall moulding design isn’t just for fancy homes or big Wall Moulding Design budgets. With the right tools and a little effort, anyone can transform their walls from dull to designer. Whether you’re going for a classic white box panel or something bold and modern, moulding adds structure, detail, and charm to your home. It’s a small change with big impact and once you try it, you’ll probably want to do every room!